- Extra Resources
- https://www.blender.org/download/
This Blender course will lead you step-by-step through creating a spooky fantasy environment.
- Create: Rocks, Grass, Trees, useful for any outdoor scene.
- Practice: Modeling, Texturing, Surfacing, Lighting, Rendering.
- Explore: Asset Library, Geometry Nodes.
What will you learn?
- translate 2d art into a 3d environment
- make your own library of nature assets useful for any outdoor scene
- build a hut you can customize to build various houses
- the ability to create nature scenes from start to finish
- knowing how to make your scene shine with the best lighting
- using your camera to present your scene
- next step: creating your own epic worlds in Blender

Chapter 1: Pre-Production & Proxy Build
At first glance, you see a painting by Nathan Proffitt (the course author's brother). Look closer...and find assets for your 3d world.
Call out those assets and build proxies for a spooky 3d environment.

Chapter 2: Creating Foliage
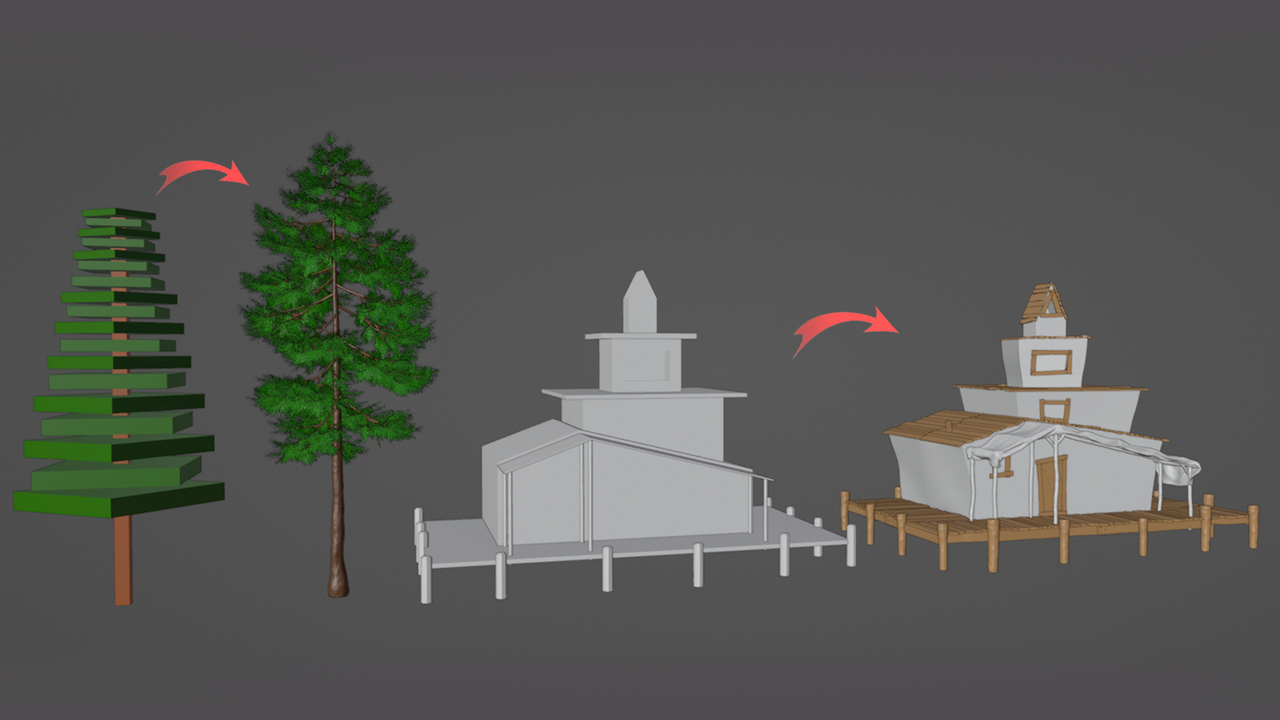
In this chapter you will create rocks, trees, and grass. These are essentials for any outdoor scene you will make in the future.We'll model, texture and sculpt our way to an entire library of outdoor assets, ready to drop into our scene.

Chapter 3: Building The Scary Hut
In the midst of what might otherwise be a walk in the dreamy woods is a ram-shackled hut. It'll be a walk in the park to build it together.Seriously, though. We'll dig into the planks and door, the deck, windows, roof, porch and canopy to build the centerpiece of our story.

Chapter 4: Look Dev
Here we go into all the details of our hut, the lantern and the landscape to bring our environment to life...or, more fittingly, to death.
Chapter 5: Scatter & Set Dressing
It's time to populate our environment and set the scene. We'll be working on scattering and utilizing raycast node to randomize the elements and assets within the environment. In a very intentional way, of course.
Chapter 6: Rendering & Compositing
Lighting can make or break your scene - and in this chapter, we'll light our scene for theatrical quality.We'll tackle to world and key lights as well as the background and accent lights. The challenge: create a dark environment that shines.
About the course author
Kenan is a guest instructor with CG Cookie and we are delighted he shared some of his time and his story with us.I’ve been a blender enthusiast for over a decade now, and I’m constantly amazed at how this powerful software has evolved. Blender was my first love in computer graphics. As I developed my 3D skills in Blender, I pursued knowledge in other areas of computer graphics and filmmaking, eventually getting a degree in computer animation. I have been fortunate to establish a professional career in the film industry, working at an animation studio as an Environment Supervisor. It seems no matter the project, I always come back to Blender! Blender is among the pieces of software I use every day on animated features films, and I absolutely love it!
Some years ago I found a niche on YouTube using Blender for VFX. This introduced me to the wonderful community that surrounds our beloved software. I continually seek to learn from others and share my experience and knowledge, as we all help each other grow in our digital creativity.